Want to know how to turn a cheap plastic animal into a unique Christmas décor piece?
Let me show you how to upcyle plastic toys into something fun and flashy for Christmas this year. The key ingredients are gold paint and glitter, because anything can become “Christmassy” when painted gold and you can never have too much glitter on a Christmas decoration! So have fun finding plastic animals, bugs, dolls or cars to use for this project.
Impress your family and friends with these very unique Christmas decorations. Have fun experimenting with different sizes and shapes of plastic toys. You can use them as place name settings, table décor or make little vignettes of Christmas cheer on a coffee table or mantle.
Dont really want a snowy Christmas decoration? Try adding sand for a beach theme or fake moss for a forest theme instead of the fake snow.
This tutorial was featured in Issue 5 of the South African Craft and Home magazine
You will need:
- Coasters (MDF, plastic, cork etc)
- Plastic animals
- E6000 glue or any strong glue
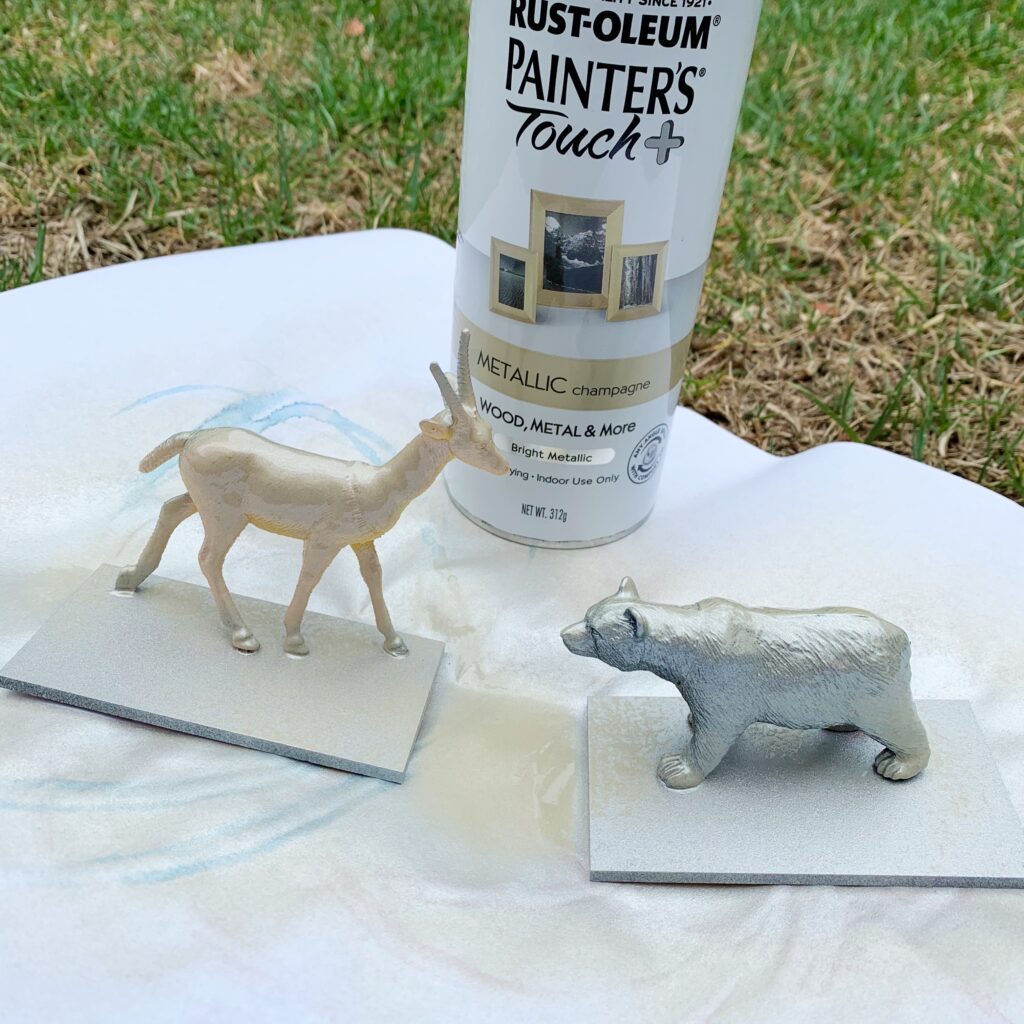
- Metallic spray paint – I used Rust-oleum in Metallic Champagne
- Metallic card stock
- Wooden keys (the wooden pegs you get with a canvas for stretching the canvas) or Popsicle sticks
- Brown acrylic paint and glazing medium (or wood stain)
- White gesso
- Fake snow
- Tacky glue or 3D gel
- Glossy accents
- Glitter
- Wooden letters
- Glass pearls (or beads, sequins etc)
- Small bells
- Metallic embroidery thread

Step by Step
Step 1:
Glue your animals to your coaster with E6000 or any strong glue. Make sure to leave room for the name sign or wooden letters if you are using those.

Step 2:
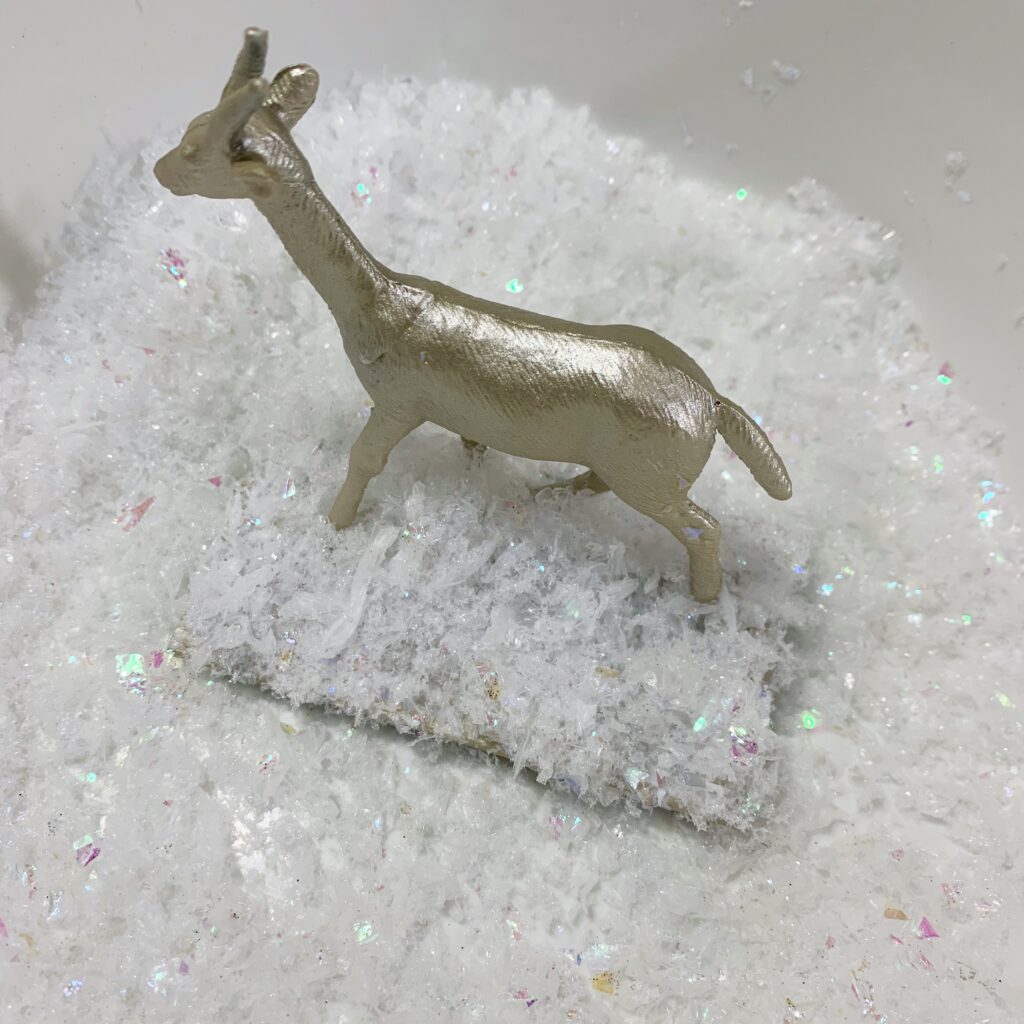
Once dry spray your animals and coaster with metallic spray paint. Work outdoors or in a well ventilated area. Spray thin layers and rather do a few thin layers than spraying too much paint in one go. If you spray the layers too thick it can cause drips and ripples when drying.
Step 3:
Once your animals are painted and dry, time to glue the fake snow (or sand/moss for a different theme). Add your fake snow into a plastic container. I mixed two types of snow (a matte white and shimmery). Use the 3D gloss gel or glossy accents (you need a glue that will dry glossy and translucent) and apply a thick layer on the coaster. Dip and scoop the surface through the snow and gently press the snow into the glue. Tap off any excess that did not adhere to the glue. If you want a thicker layer of snow you can do a second layer once the first layer is dry. Apply the second layer of glue on top of the first layer of snow.
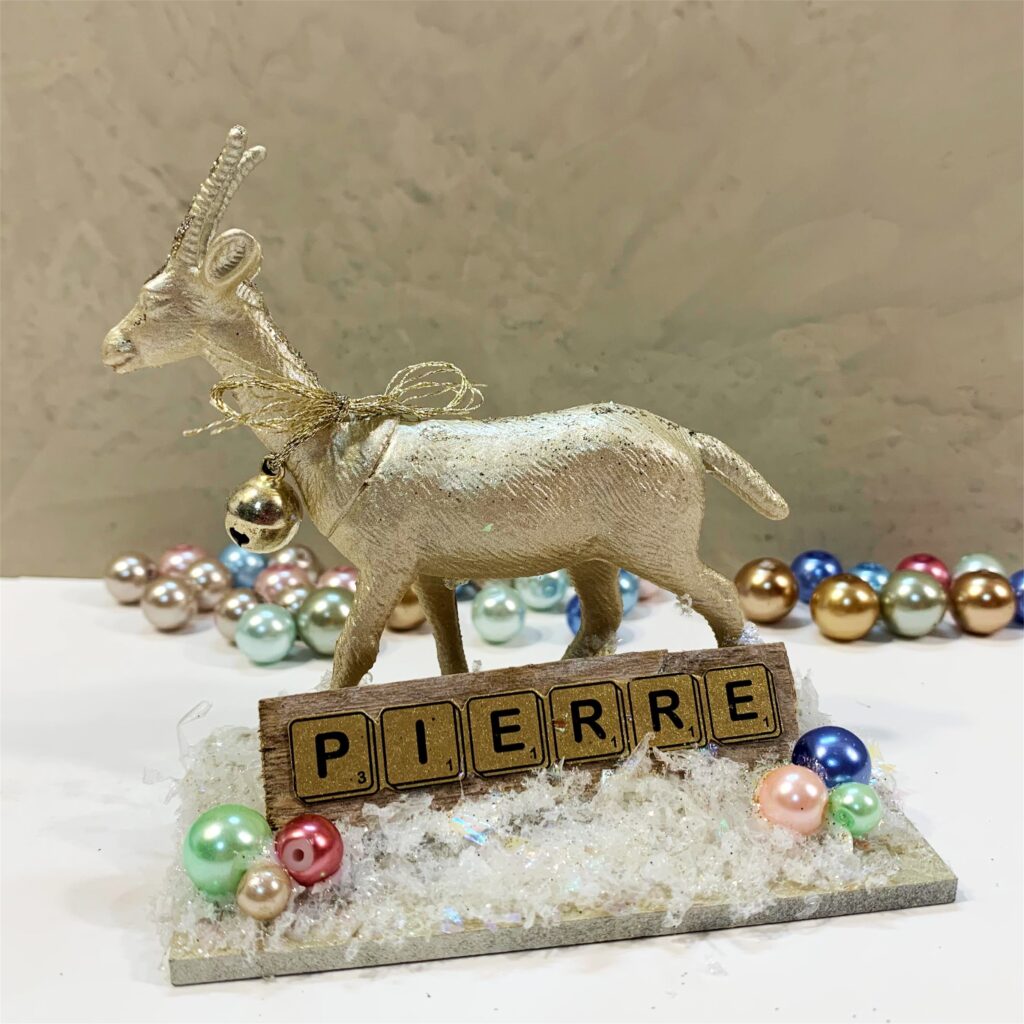
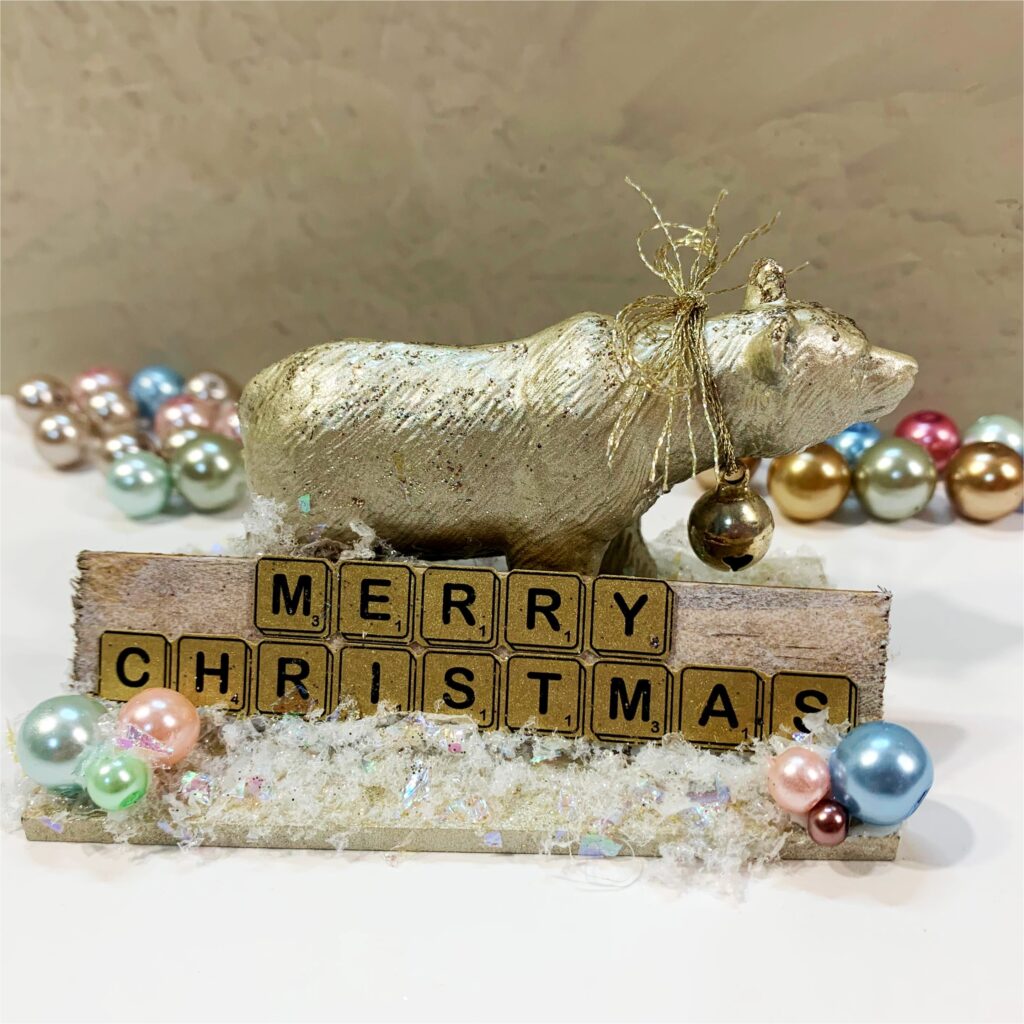
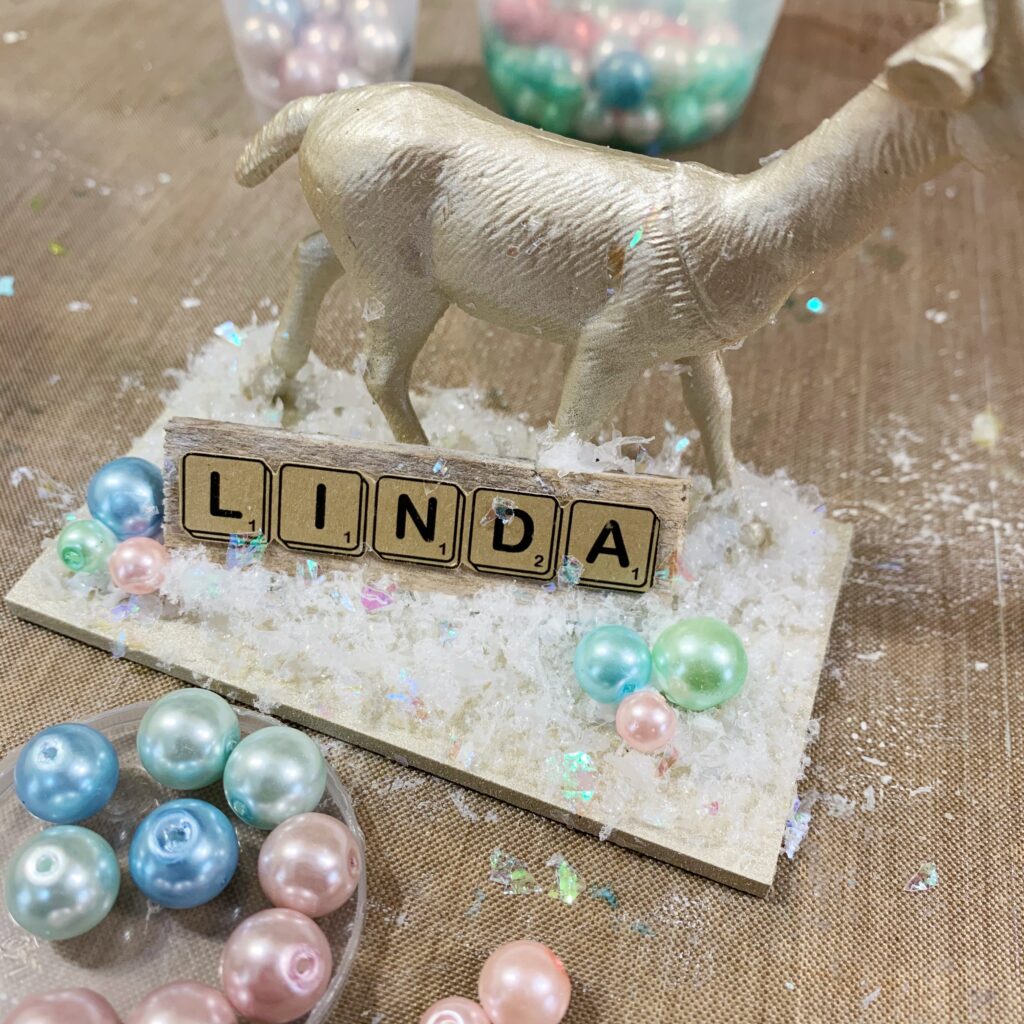
Option A: Place Name Settings:
Step 4:
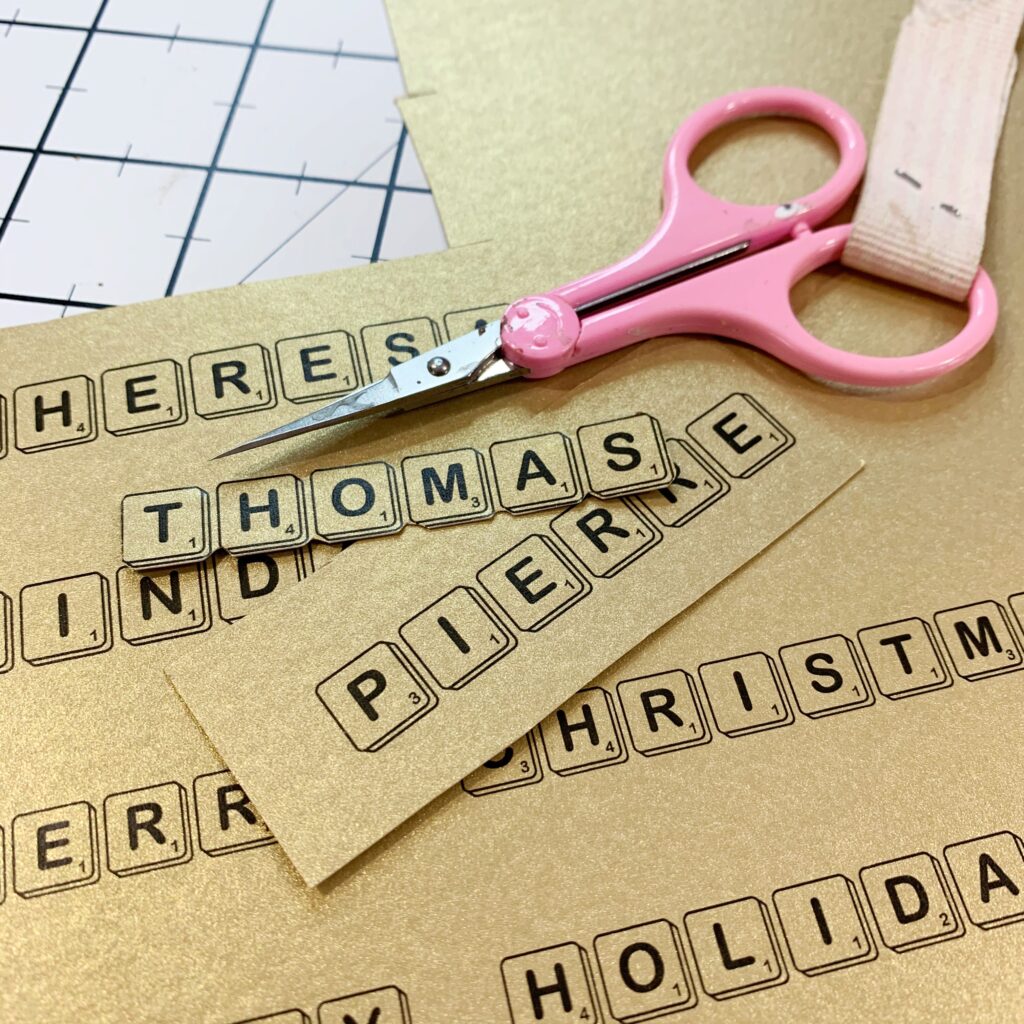
Print your names or sentiments on metallic card stock and cut them to size. I used a scrabble font I found online, but you can use any font you fancy.
Step 5:
Paint a layer of brown acrylic paint mixed with glazing medium (to make it translucent) or use a wood stain on your wooden keys (those wooden thingies you get when you buy a canvas) or alternatively use popsicle sticks. If you cant get your hands on a glazing medium you can dilute the brown acrylic paint with a little water. Just keep in mind that when you dilute paint with water you also dilute the binder and if diluted to much the paint will eventually peel off.

Step 6:
If using the keys, use your E6000 to glue the slanted sides together to make long wooden sticks.

Step 7:
Once the brown stain is dry, paint a layer of water diluted white gesso and dab off the excess with a baby-wipe. These two steps create the perfect ‘old barn-wood’ look. The key here is to work quickly before the gesso dries, do each wooden piece individually to make sure you get time to wipe the gesso layer before it dries.

Step 8:
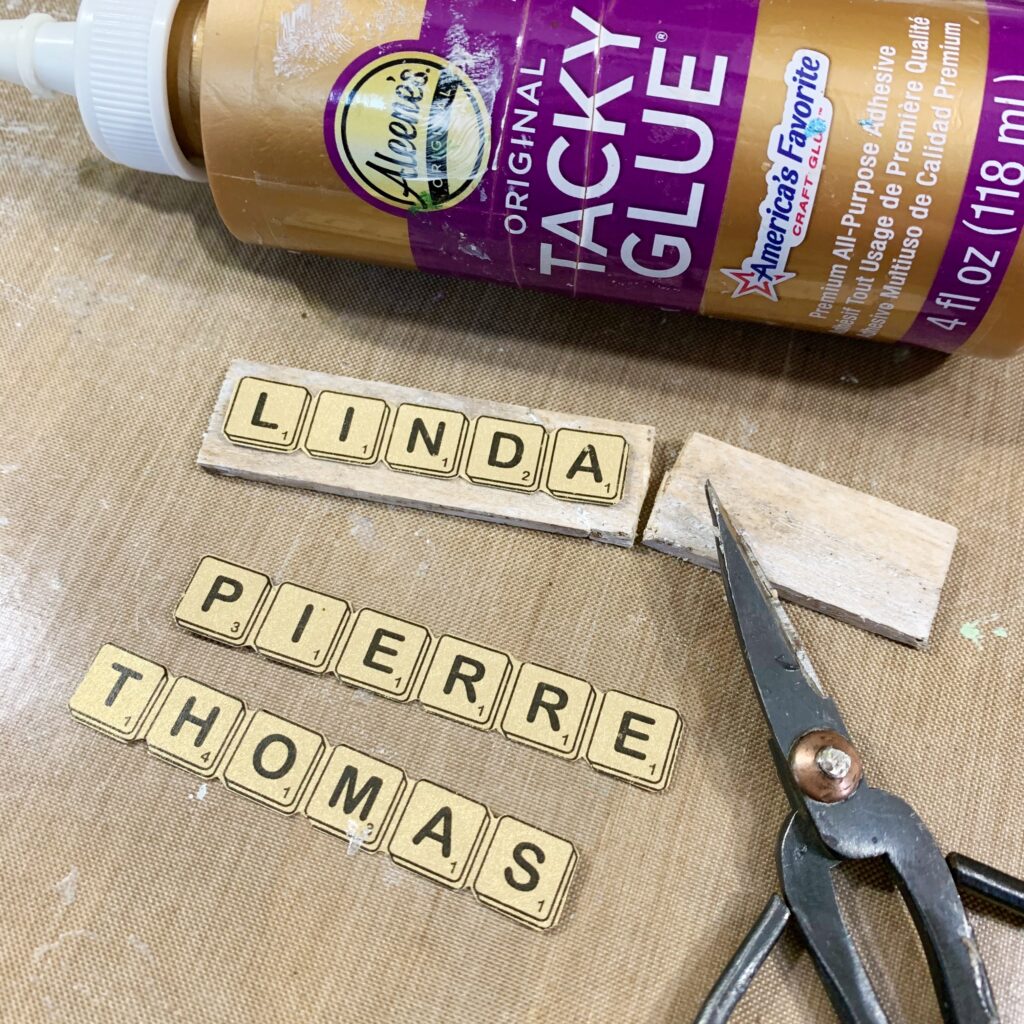
Glue your names/sentiments to the wooden sticks and cut off any excess if needed.
Step 9:
Glue your names/sentiment to the coaster with 3D gel or tacky glue – its best to wait until the snow is dry. For extra stability I leaned the wooden stick against the animal and added a dot of glue in that spot.

Option B: Table décor pieces
Step 10:
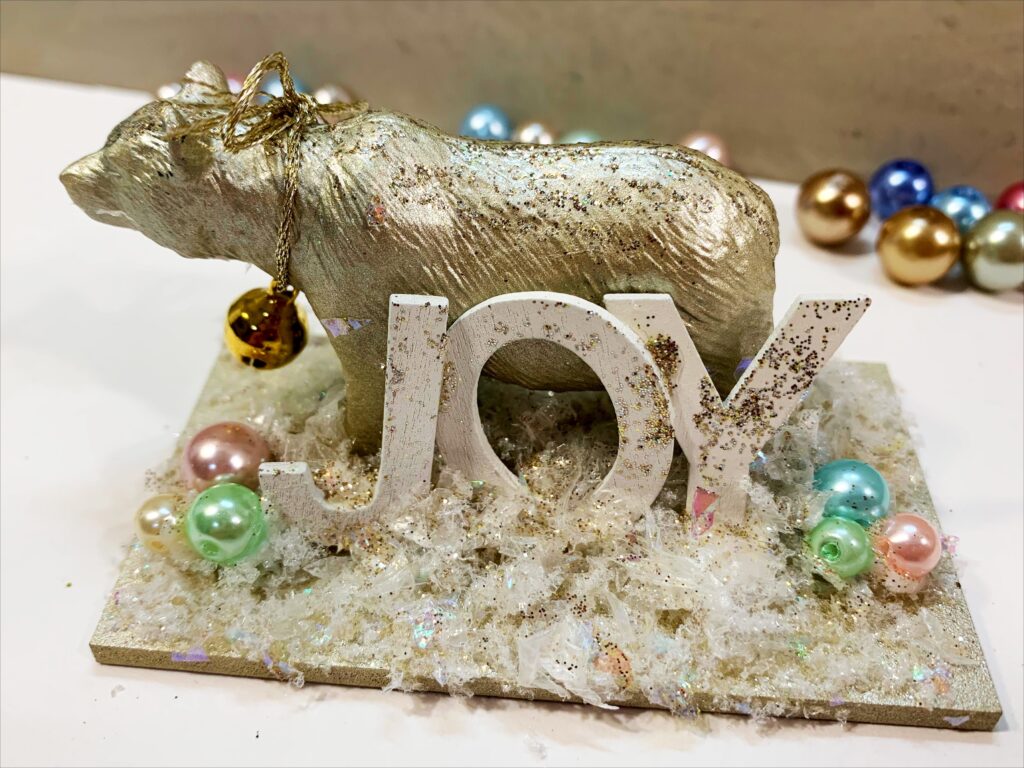
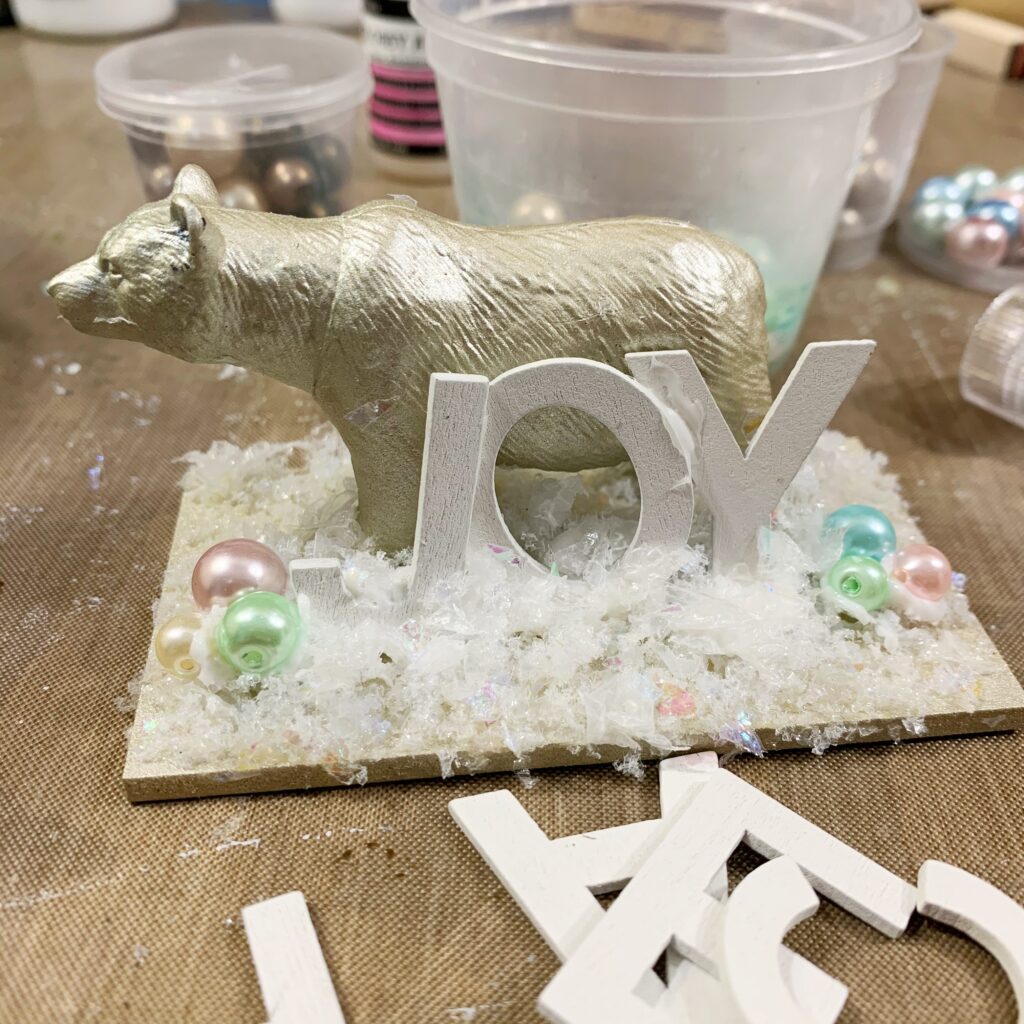
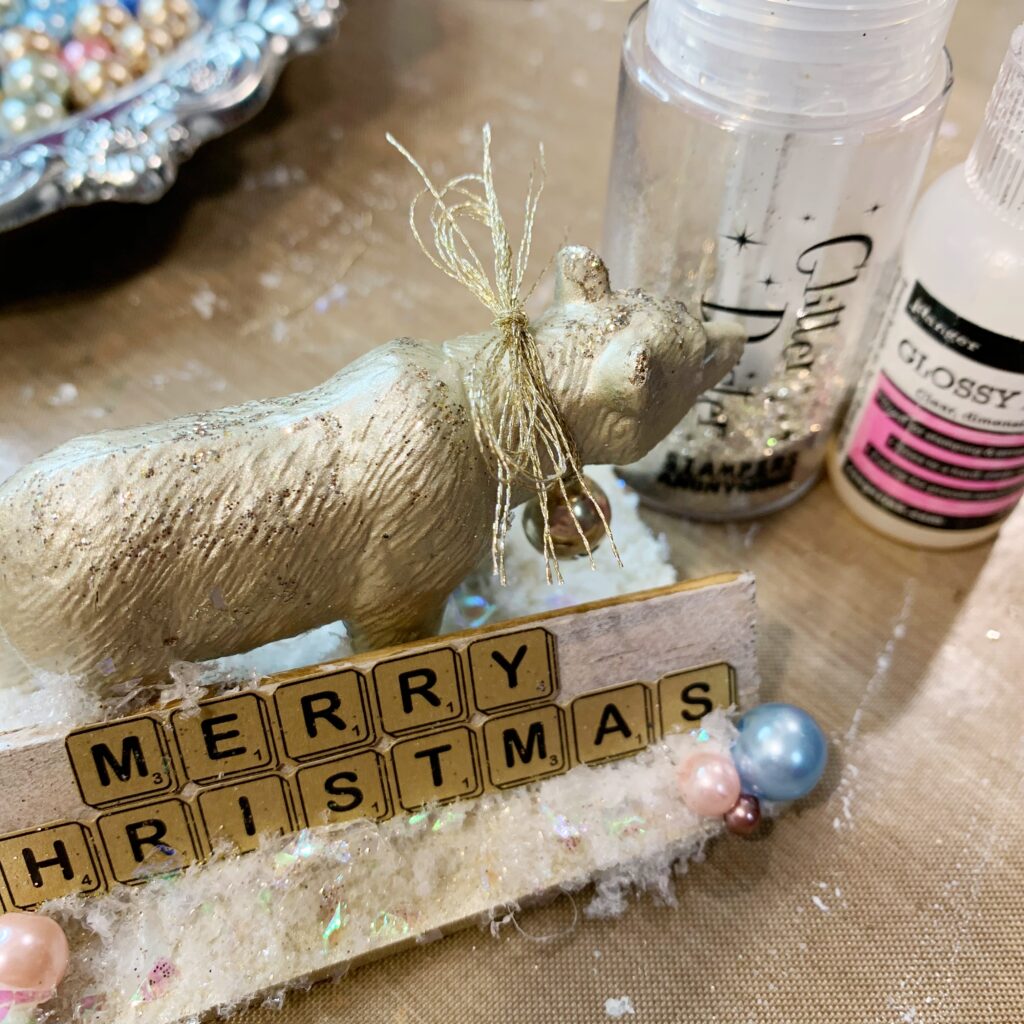
Glue your wooden letters to the coaster with 3D gel or tacky glue. Have the letters lean against each other and the animal, add glue to these spots to secure the letters properly.
Final touches
Step 11:
Glue a selection of pearls or beads to mimic baubles. This is the fun part where you can colour code to match your décor.
Step 12:
Use metallic embroidery thread and tie a bell around the animal’s neck

Step 13:
Apply a thin layer of glossy accents to the back and head of the animals and apply glitter. I used a glitter duster for a very fine layer of glitter but you can sprinkle the glitter with your fingers or with a tea spoon.
All done! Feel free to add more ‘toppings’ like sequins, seed beads or glass glitter. Anything goes, you can even upcycle old, broken or unused Christmas tree decorations in your project.
If you make decorations using my tutorial, I would love to see how they turn out – tag me on instagram @theresabouwer or use the hastag #tttutorial on social media.